Knife making is such a booming field these days that knife makers often are very busy with filling orders. This leaves them with very little time for anything else for example making leather sheaths for knifes. And, frankly, most knife makers would prefer spending their time grinding steel rather than working with leather.
Leather can be sewn, stamped, tooled, carved, moulded, dyed, laminated, painted and even burned with an electric pencil. Leather, furthermore, can be decorated beautifully with porcupine quills, covered with beadwork, laced or one could even work bits of branded horsehair into the design for a Mexican motif. This material comes in all shapes, sizes and finishes with varying appearances and thickness, adding to its uniqueness.
The most popular leather for making sheaths is without a doubt cowhide. Cowhide is relatively inexpensive with remarkable durability. During this tutorial the focus will be on how to use cowhide to make a sheath, keeping in mind that there are many other options available. Once you have made your own sheath you could experiment with the different types of leather available. Canvas, wood and kydex are also exciting possibilities for an inventive sheath maker.
It is important that all fixed-blade knifes must have a sheath - the only exception should be kitchen knifes – for their protection. The requirements of a sheath are straightforward. It should fit the knife not only in it’s shape but also aesthetically. The material must be durable and suitable to the environment in which it is expected to perform. The sheath must fit snugly around the knife so that it won’t get lost but the knife should still be able to be comfortably withdrawn when needed.
Equipment required

In order to make a leather sheath you will need some basic tools:
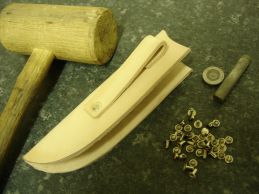
- Mallet (A):
Used in many trades and has different uses - banging in rivets, flattening stitches, attaching press-studs etc. Make sure that the mallet you buy is not too heavy.
- Needles (B):
Essential for constructing and decorating your work. Harness needles are undoubtedly the best. They have an oval eye and a blunt end.
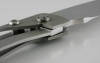
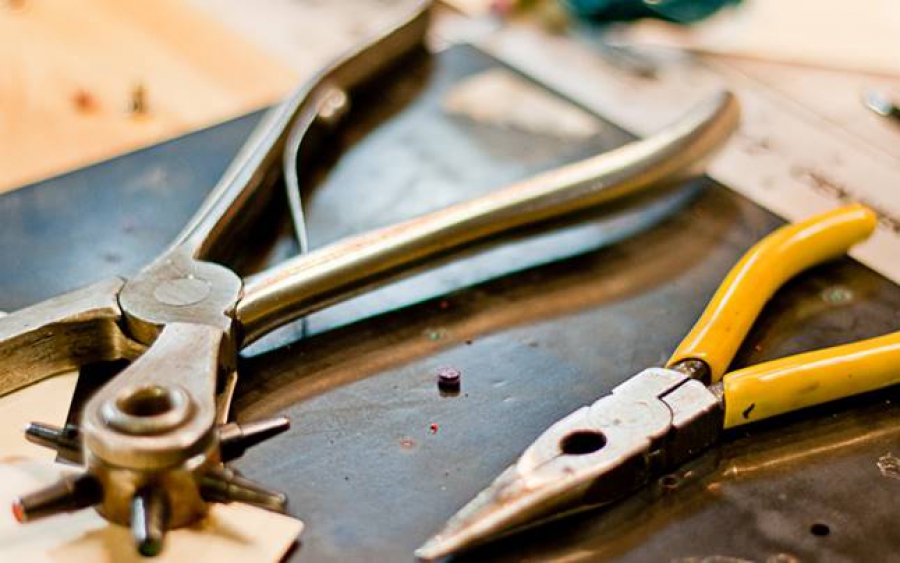
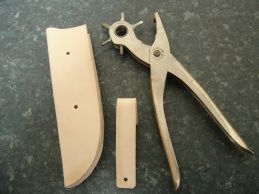
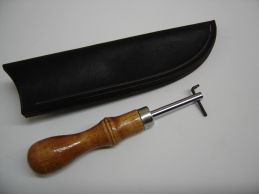
- Lacing nipper (C):
For making holes in leather for stitching. There are alternative ways to do this but the lacing nipper is by far the most effective.
- Edge shave (D):
Used for bevelling the edges of your work, creating a very professional look. It is available in various sizes. For the type of bevelling done when making a leather sheath, I would advice using a number 3 edge shave.
- Stitching groover (E):
The stitching groover marks out where the stitching should be done. When you do the marking keep the tool tight against leather edges to ensure an uniform gouge along the edge.
- Knife (F):
A Stanley knife with detachable blades is best for all-round use. It is excellent for the more intricate work as well as for the larger cuts.
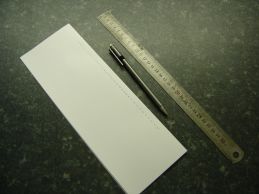
- Ruler (G):
A good steel ruler is vital and should be at least 30cm long. It comes in very handy for support while cutting the leather and for measuring out patterns.
- Scissors (H):
The scissors you choose must be of good quality, as light substitutes will just not be able to cut heavier leather efficiently. It is handy for cutting paper and card pattern templates.
- Revolving punch pliers (I):
Make holes of varying sizes for lacing, attaching press-studs and rivets. The sizes vary from 0-6.
- Thread (J):
The brands available are plentiful. Some of these threads is already waxed. However, you can run a length of untreated thread through beeswax at home.
- Rivet setter (K):
The two parts are a (male) protruding base and an (female) inverted cap. When the correct sized hole is made in the leather push the base through, then place the cap on to the prong and push the two firmly together. Then strike it with a mallet, forcing them permanently together.
- Leather:
Natural in colour, but can be brought pre-dyed. Its thickness varies from 1.5mm to 8mm and a hide will measure about 280sq.cm. The back and butt part of a hide are normally the finest pieces but the rest of the hide could be used for most tooling, carving and other craft projects. Vegetable tanned leather is the best.
Getting to work
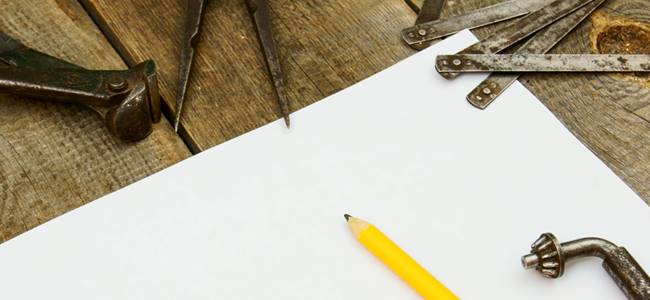
Fold a sheet of paper in half and draw a line vertically - ±1 cm on the folded side. Place the knife on the drawn line.
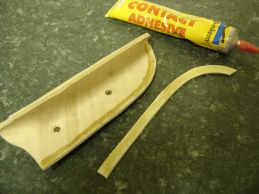
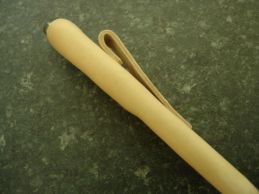
Draw the shape of the knife onto the paper. Allow sufficient space (an additional ± 1cm) when the pattern is drawn for the welt to be sewn to ensure a proper fit. A welt is a piece of stiff, thick leather that fits between the two sides or edges of the sheath to protect the sharpened edge of the knife and give stiffness to the sheath.
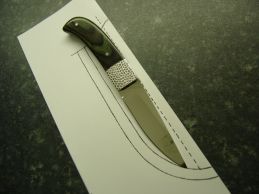
Cut out the shape and unfold the paper. Now you will have the template of the leather that you will use. When you are satisfied with the pattern, transfer it to the leather by laying the template on the leather and outlining it with a sharp pencil. Make sure that you do all cutting on a sturdy surface. A piece of white pine could be used on top of a table. It makes an effective cutting board.

The paper template is now used to cut out the shape of the sheath from the leather. A sharp knife is necessary to make clean cuts.
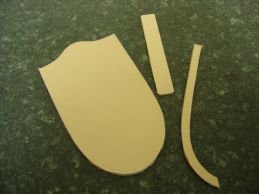
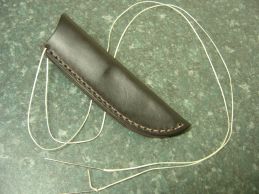
- Cut the belt loop next. It should be at least 2cm wide.
Dampen the sheath and belt loop with a wet sponge on the inside and outside before bending it.
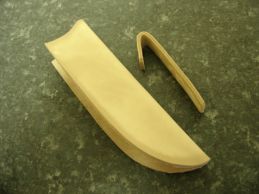
Leave for a moment to dry, then mark and punch the holes for the rivets in the belt loop. Mark the position for the rivets on the sheath.
Punch the corresponding holes in the sheath. Attach the belt loop to the sheath with rivets. Instead of the rivets the belt loop can also be stitched to the sheath.
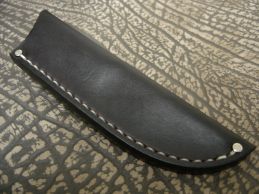
The welt is glued to the inside of the sheath. You can finally glue the sheath together now.
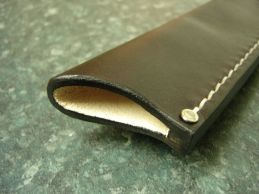
Smooth the egdes by sanding it with a small belt sander. A hardwood stick can be used to rub the edges and smooth them out.
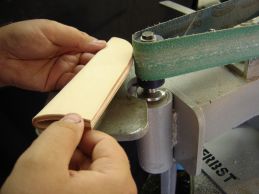
- An edge shave is used to trim the edges, giving a finished strip to the raw leather.
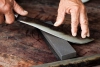
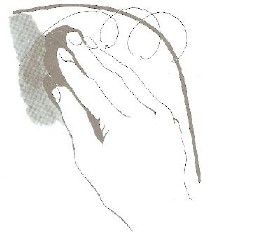
The sheath is almost done. Run the finished sheath under the faucet to dampen it and force the knife into the scabbard. Work your fingers around the knife to wet-form the sheath.

- Once the knife is removed dry the knife thoroughly. Even rust resistant steels such as 12C27 can be damaged by wet leather and a light coating of oil on the blade will help to preserve its beauty.
- When the sheath is dry, it can by dyed. Dissolve a teaspoon of Oxalic acid crystals in 500ml of water. Dip a sponge in the solution and clean the surface of the leather.
Dying the leather: I prefer spirit dyes as it gives a far more permanent, rich tone. Dip a piece of sponge into the dye and apply the dye to the leather in swift circular movements until the colour is evenly spread. Allow the leather to dry and apply a finishing coat of (313) leather dressing.
I prefer not to dye the inside of the sheath because the dye hardens the leather and it could scratch your blade or mirror finished bolsters.You can start stitching when the sheath is finished and the dye is thoroughly dry.
This should be done lastly so that the thread can contrast with the darker background of the leather. If you prefer the thread to be the same colour as the leather you should do the stitching before you dye the leather.
Use the stitching groover where the stitching should be. Keep the tool tight against leather edge to insure a uniform gouge along the edge.
Cut the holes for the stitching. Using the revolving punch pliers punch two holes in the sheath, one at the top and one at the bottom for rivets. This will prevent the knife from accidentally cutting the thread.
How to thread the needles:
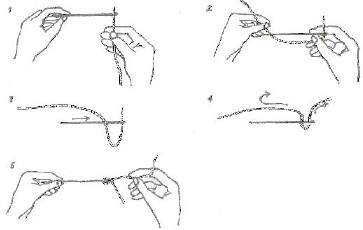
- Push the end of the thread through the eye of the needle
- Pierce the thread with the needle point as shown
- Push the thread up on the needle to eye
- Pull the end of the thread though the eye as far as it will go
- Hold the needle and pull the thread over the eye to lock the end of the thread
How to saddle stitch:
There are many different types of stitches that may be used on leather, including the numerous traditional needlework stitches such as running stitch and blanket stitch. There is, however, only one proper way to stitch leather. The saddle stitch is by far the best method for sewing two or more pieces of leather together.
Use a piece of thread approximately seven times the length of the stitching to be done. With a needle on both ends of the thread push one needle through the first hole (rivet hole) and pull to the centre of the thread.
Push the needle from the back through the second hole, and then push the needle from the front through the same hole. Pull the stitch tight and repeat the process with the next hole. Repeat in this manner for the full length of the sheath.
To finish, back stitch through the last two holes and cut the threads off flush with the leather. Place two rivets in position and finish all the edges with the black belt edge.
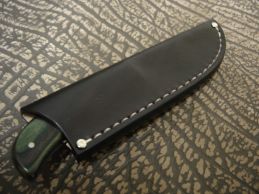
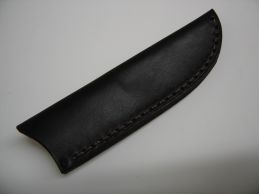
Congratulations! You now have completed your first sheath! A good, sturdy sheath will last for years, protecting the knife and giving the user the satisfaction in knowing that he has done it himself.