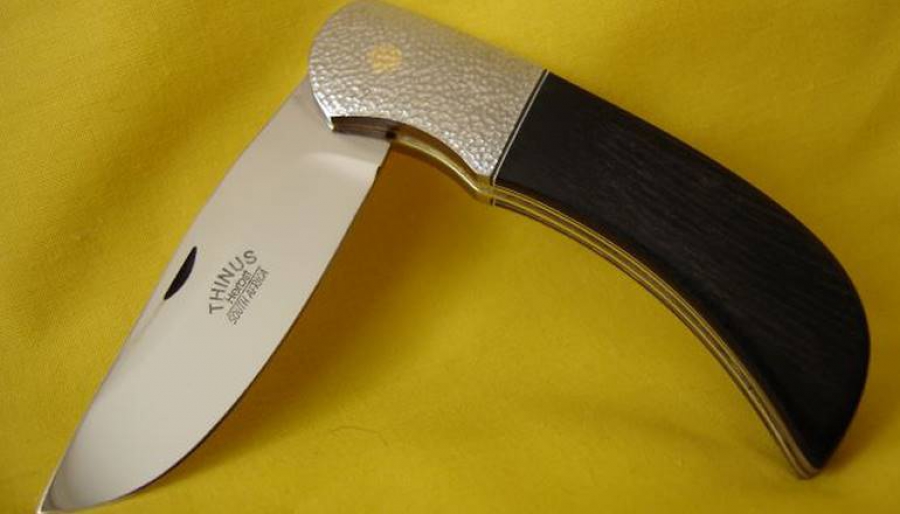
The components of a slip-back folding knife:
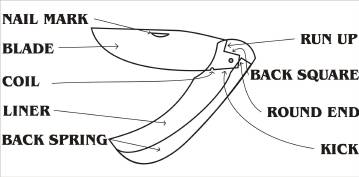
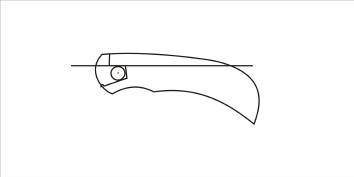
When the blade of a slip-back folding knife is opened, the “run-up” stops securely against the top of the spring while the spring is pressing against the “back square”.
If the knife is halfway opened the “round end” of the blade depresses the spring. The distance of travel in the spring at this point is called the “spring rise” which is usually approximately 1mm to 1.5mm.
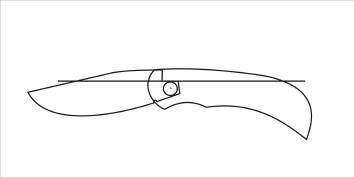
The round end can be filed flat to create a stop in the half-open position.
When in the closed position the spring will press against the tang of the blade, keeping it closed. The “kick” rests against the spring, preventing the blade from over-shooting when closed. This prevents damage to the cutting edge against the spring when the blade snaps close.
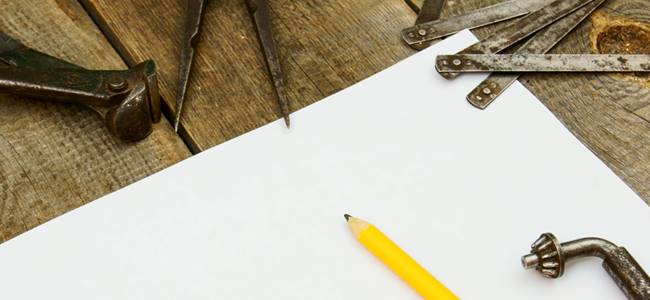
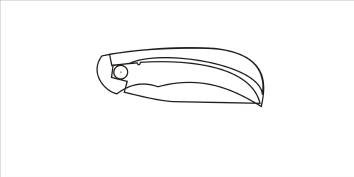
The basic design and layout of a slip-back folding knife.
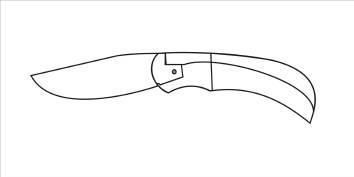
There are no set rules when it comes to designing a slip-back folding knife but there are some guidelines that could help one in starting out making a slip-back folding knife.
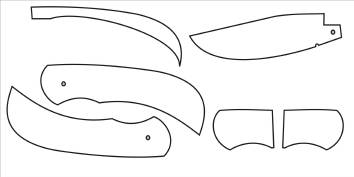
When you start with your design use a blank sheet of paper and make a free hand sketch of ideas for the outline of your knife. It is not necessary to draw the outline to scale at this stage - it is more important for you to be creative in your design. Once you have drawn a design you are satisfied with your design, make an accurate drawing of the handle to scale.
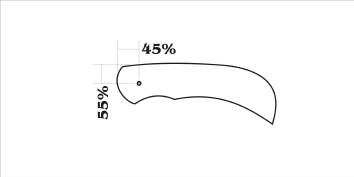
Determine the position of the pivot point. This is vitally important because many measurements that you still have to make will originate from the pivot.
The centre of the pivot is approximately 55% of the width of the handle from the top of the liner, and approximately 40 to 45% of the width of the handle from the front of the liner.
Determine the width of the spring. This is usually 1.5 to 2.5 times the thickness of the spring. Draw a line that distance from the top of your handle.
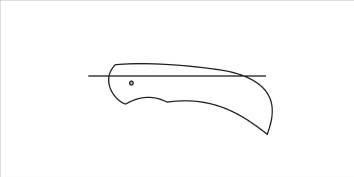
Measure the distance between the pivot point and the line. With this measurement as radius, draw a circle with the pivot point as the centre.
The tang is now drawn (see sketch) with the circle determining the top and bottom of the tang. Note that the back end of the tang is flat and slightly outside the circle. This will allow the blade to stop at a right angle to the handle. This safety measure prevents the blade from closing too quickly.
Measure the distance from the pivot point to the back of the handle. Deduct from this measurement the width of the spring. That should be the length of the blade. Now draw the blade accurately.
Trace the outline of the blade including the pivot hole with a sharp pencil onto tracing paper. Set a scribe point at the pivot and slowly rotate the tracing through the revolution that the blade will follow. When the blade has been spun around the closed position, draw the “kick” and complete or change the shape of the tang, blade and handle. Define and shape the non-working end of the spring.
Make a few photo copies of your design before transferring them onto the steel. Do not cut your drawing to make metal templates. Keep al your drawings and sketches for future reference. Extra copies also come in handy when one wants to make minor changes to the design.
After completing your first folder, keep using this model until you have perfected your design. Then you can move on to the next design.